

A clear path to
your first message.
Start with one test customer. Check the audience, shape the message, and follow the result before opening the journey to more people.
Start with your appFor operators working with a team that has installed NudgeOn and connected its app. The current public release is Alpha.
Begin with a connected app.
Your team’s console and the customer’s app work together. Confirm the connection with your developer before preparing a campaign.
In the consoleStart setup · App settings
Confirm your workspace
Open the console address provided by your administrator. In Start setup, check the app name so your team is working in the intended environment. Ask the administrator for access if you cannot reach it.
Complete the app connection together
The setup flow covers SDK keys, channel credentials, the first event, and a test send. Your developer handles the SDK and FCM or APNs connection; you agree on the event names and the test customer to use.
Set the sending rules
Review the app’s time zone, quiet hours, and frequency limit in App settings. Use a test device with notifications allowed, a registered push token, and the correct customer identity.
Before you continue
The intended app is selected, its first event is visible, and your developer has confirmed the push channel connection.
Keep provider credentials and server keys with the person responsible for the integration. Screenshots and support requests should contain only the information needed to identify the issue.
Know who should receive it.
A customer is a profile. A segment is a set of conditions that selects profiles. Start with a customer you can identify before defining a wider audience.
In the consoleUser search · Data · Segments
Find your test customer
In User search, enter the exact customer identifier or email address. Open the profile and inspect its devices and recent events. The identifier is the value your app uses to recognize the customer.
Check the data you will use
Use the Data screen for collected attributes and collection errors, and the customer profile for recent event names. Match names and values with your developer. A rule based on an event that has not arrived cannot describe the intended audience yet.
Create and preview a segment
Choose New segment and give it a name your team will recognize. Add attribute or event conditions, then use AND when every condition must match or OR when any may match. Review the estimated audience before saving.
Before you continue
You can explain each condition in one sentence and the preview fits the audience you intended.
The preview is an estimate at the time of the query. Device state, permission, consent, and sending rules are checked separately. Before sending, ask your integration owner to confirm that opt-outs and logout changes also reach the server; automatic SDK synchronization of these changes is not yet complete.
Start small. Then build the journey.
A test push checks one customer’s connection. A journey decides when customers enter and which message or wait step comes next.
In the consoleStart setup · Test send · Journeys
Receive a test push first
In the setup flow, send a test to the customer identity used on your test device. Watch the device and open the notification. A queued confirmation means the request entered the queue; check the actual notification as well.
Create a focused journey
Choose New journey and name it. Segment entry uses a saved segment; event entry uses the exact event name collected by the app. Event entry has no segment filter, so test it in a separate test app with a test-only event. Add a push message, write its title and body, and add a wait step if needed.
Save, validate, and activate deliberately
Save the draft, then choose Validate and activate. Resolve the highlighted issues and review the activation summary. Activation can send real messages. Use a controlled test segment for segment entry, or the separate test app and test-only event for event entry.
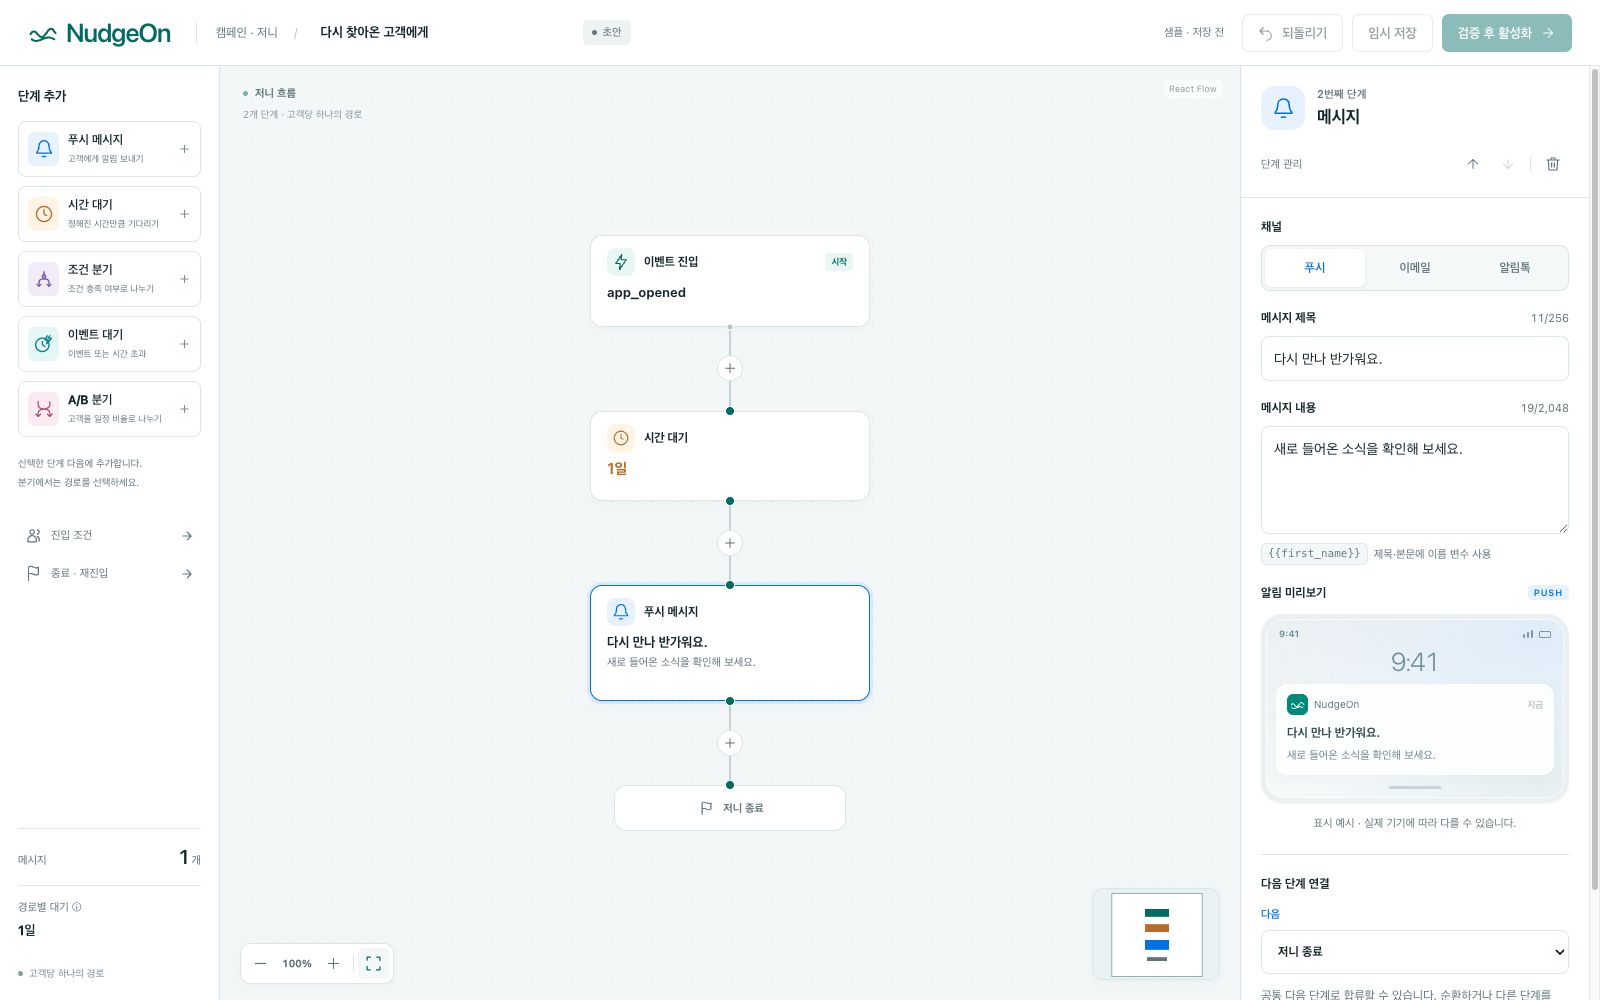
- An app event arrives
- Wait for a set time
- Send a push message
An example of the sequence, not an active campaign. Choose the event, audience, delay, and content that fit your app.
Before you continue
The test device received and opened the message, and the journey’s audience, entry condition, copy, and sending rules have been reviewed.
To edit an active journey, use Pause and edit. Waiting deadlines continue while paused; customers already in a journey keep the version they entered. Review the effect on those customers before resuming.
Follow the message all the way through.
Sending, device delivery, and opening are separate events. Use the report and the individual message log together to understand what happened.
In the consoleDashboard · Journey report · Message logs
Read the journey’s progress
Open the journey report to inspect entered, waiting, and completed runs and the results of individual steps. Use the dashboard for an overview, then narrow the review to the journey you changed.
Inspect individual messages
Use Message logs to review the customer, channel, time, status, and failure reason for a send. A provider accepting a message is different from the device displaying it. Delivery and open reports depend on the corresponding SDK events.
Record what you can verify
Compare a controlled test with the device: notification received, notification opened, and the corresponding result recorded. If the report is incomplete, give your developer the time, customer identifier, journey, and visible error, with private values removed.
Before you continue
You can distinguish a request that was queued, a provider send, an observed device receipt, and an open event.
Use evidence from your own connected app before expanding the audience. A preview on this website is a demonstration; it does not send a message or establish delivery.
When the result is different
No customer or event appears
Check the customer identifier and the app environment first. Ask your developer to confirm the SDK connection and event collection.
The audience estimate is unexpected
Review AND/OR groups, attribute values, event names, and time windows. Check a known customer profile against the conditions before broadening the audience.
A test is queued but no notification arrives
Check the device notification permission, registered token, customer identity, and channel credentials with your developer. Then inspect the message log for its actual status.
The journey cannot be activated
Read the highlighted validation issues. Confirm the entry event, required message fields, and connections between steps, then save and validate again.
A push arrives but the report is missing an open
Open the notification on the test device. Ask your developer to check delivery and open event reporting; do not treat a missing event as proof that the user did not see the message.
Keep your team on the same page.
Use this guide for the operating steps. Share the developer center with the person connecting your app and managing the infrastructure.
Open the developer center